Off-White Shirt
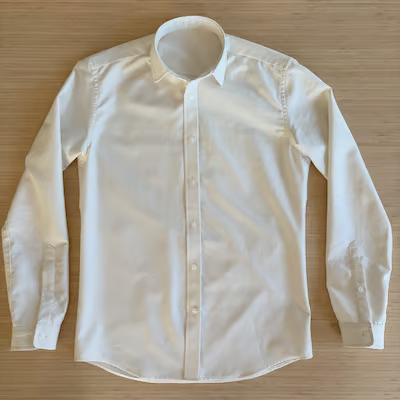
- Pattern: modified Fairfield Button-up Shirt by Thread Theory
- Fabric: 100% cotton flat sheet from Macy’s
- Started: 7 February 2026
- Finished: 19 April 2026
I made this shirt out of the same material as Contrast Thread Shirt, but in a different color. Each of these twin flat sheets cost $16, but I only used half of the 66ʺ×96ʺ, so they’re more like $8 shirts. Not counting labor, of course! The fabric looks surprisingly good once it’s ironed – I don’t think you could tell it’s a bed sheet. But I do want to try using nicer shirting cotton soon.
I tweaked my pattern some more, making the yoke 1/2ʺ wider and the overall shirt 1ʺ bigger around. However, I made a mistake with the allowance of the side seams, resulting in it only being 3/4ʺ bigger. As before, I left the back flat with neither pleats nor darts. On the cuffs, I did three small pleats instead of one big one. Overall I’m very happy with the fit.
This time I used WAWAK Profuse flexible woven cotton interfacing. I’m not totally clear on how to choose woven vs. nonwoven on the one hand, and sew-in vs. fusible on the other. David Page Coffin’s preference for bleached muslin makes me think woven sew-in is better, but I couldn’t find that combination on WAWAK. I have muslin, but it’s unbleached, so I worried it might be too dark with this fabric. I’ll probably try it on a future shirt.
Instead of 2.4 or 3 mm stitch length, I used 2 mm throughout. I like it better. It’s harder to unpick when I make a mistake, but that happens less often now. For the machine needle, instead of 75/11 universal, I used 70/10 Microtex. In theory, Microtex makes straighter stitches because the sharp point pierces through the fibers rather than pushing them aside. When sewing, I relied more on gauging position by eye. I’ve realized the edgestitching foot only works if you have a perfectly straight edge. When pressing, I experimented with using a spray bottle instead of putting water in the iron and waiting for its unreliable steam, and I used a wooden rolling pin as a clapper.
The hardest part of all my past shirts has been the cuffs and collar stand. I would sew along three sides, turn out, and edgestitch the fourth side down. But that last step never really worked, so I would have to awkwardly shove raw edges inside at the corners and hand stitch them shut. This time, I tried the method from Chapter 7 of Shirtmaking:
The technique I’m about to show you is so good that it almost belongs in the realm of trickery. It’s a way of ensuring that the ends of collar bands and cuffs match the respective edges of front bands and plackets, while completely reducing the bulk of the combined seam allowances. I owe the idea for this technique entirely to a fascinating book called Sewing Magic by Barbara Hellyer (see the Bibliography on pp. 168–169). I send her a little heartfelt gratitude every time I make a shirt. With a little adaptation, her method was really the final touch that assured me that I could easily make professional-looking shirts. It’s only one of many great ideas in her book, which I recommend wholeheartedly, if you can find it. p. 97
The basic idea is that during the first step, instead of stopping at the corners, you continue sewing a couple inches into the fourth side. This requires some careful folding to avoid sewing through the rest of the garment. But it means that when you turn it out, the corners are perfect!
One thing I want to try for my next shirt is using the rolled hem presser foot. I still need more practice to be able to use it for a curved hem. But, I realized that if you only feed enough fabric for it to fold once, then you can also use it for straight flat felled seams. I did a few tests and found this gave me crisp 1/8ʺ seams, which is how they look on my professionally made dress shirts.